startban2.gif (3279 bytes)startban2.gif (3279 bytes)startban2.gif (3279 bytes)startban2.gif (3279 bytes)
Enter Part Description, Full or Partial:
 
 
This is a photo of a car with a bent lower hinge. Although this door has been adjusted somewhat a slight difference is noted from the top to the bottom of the door gap.
   
A close up of the lower door hinge. Notice the pucker, and subse-
quent rust on the door skin.
   
Insert the sanding block so that it butts up against the door seal
channel and not to the outer edge of the door.
   
Proper position of the sanding wedge prior to hinge adjustment.
   

With 
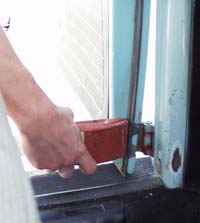
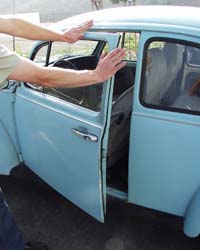
the sanding block in place, start by moving the door to the closed position using a SMALL amount of force, this will apply pressure 
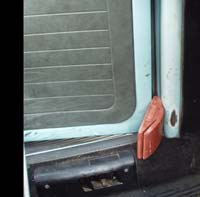
on the sanding block wedge. Check your door align-
ment after every ad-
justment to verify pro-
gress. The worst sit-
uation that can develop is to use too much force, thus causing the hinge
to be bent past the cor-
rect position. It is impor-
tant to take small steps during this process.

   
Success at last!! Notice the proper bodyline alignment of the door and quarter panel in that they form a straight line. Never judge the alignment of the bodyline by the body molding, as they can distort with age (as in our example).